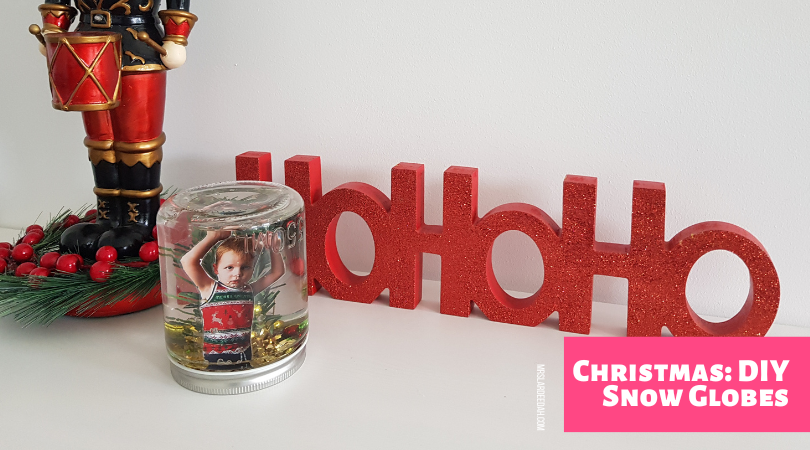


Children’s Christmas ornaments are always a fun keepsake to look back on, especially when it involves an element that reminds you of how small they were! These snowglobes are a heap of fun to add to your mantle and will be a great memento in the years to come.
What you’ll need:
- a jar
- a laminated photo of your child (tip: if you don’t have access to a laminator, you can cover your picture with clear sticky tape instead! Just make sure it is sealed tightly so the picture won’t get wet)
- glitter, beads or any sparkly bits that will add to the “snow”
- A bit of a Christmas tree branch and some tinsel
- A hot glue gun
You need to start out with a laminated (or sticky tape covered) photo, cut around the body leaving a 5mm gap to ensure no leakage onto the photo paper. The pose your child holds is up to you, but it’s a bit of fun to have their arms up in the air when the snow is falling.
Using a hot glue gun, stick a bit of a Christmas branch and your photo to the inside of the lid. You might like to add a bit of tinsel to the base, it is up to you.
Put your glitter, beads and other sparkly bits into the jar – the more generous you are the more “snow” you will have.
You now need to fill your jar with tap water. Fill it as much as you can, as the gap of air will sit at the top of your jar when you flip it. I carefully dipped my photo lid into the jar, tightened and flipped to check the levels, and then flipped back over.
To ensure no leaks, it is best to line the inside of the jar lid with some hot glue, however once you have attached the lid there is no taking it off again, so make sure you are 100% happy with the placement of everything before doing this. If you do experience any leaks, some more hot glue (or silicone if you have access to it) on the outside of the lid will help stop this.